Thursday, July 19, 2012

Teshima Restaurant- Kailua-Kona, Hawaii


Teshima Restaurant (located at 79-7251 Mamalahoa Hwy, Kealakekua, HI 96750) is a family restaurant, with 3 generations currently working in the Japanese-style joint. Shizu-Obaachan, who recently turned 107, is still running the place as cheerfully as ever. It's a little in the middle of nowhere on the Kailua-Kona-side of the Big Island, but if you're in the area and want a nice lunch or dinner, stop here!

Price: $$
Overall Experience: 4 stars/5 stars

Teshima is best known for their tenpura/tempura, or Japanese battered and deep fried foods dipped in a brothy-sauce, so naturally I had to sample this on my first trip to the restaurant. ("What the Big Island Likes to Eat" highly recommends the kettle-cooked tofu dish and I can say that was also fantastic--my huge family ordered basically half the menu, so I had a good go at everything.) I ordered the Thursday lunch special, which comes with a cup of miso soup, a tray of pickled veg, a bowl of rice, barley tea, a side of really tasty and well-marinated spare ribs and gorgeous platter of golden tenpura. The tenpura was traditionally done and perfect--not over or undercooked, not too oily, great colour, etc... Teshima served up these things in my tenpura: ahi, yam, zucchini, eggplant, green bean and a lovely surprise of purple potato! Look at that colour!:

The dipping sauce was also great, not overly salty, with a nice sweetness. The spareribs were magnificent (I'd just gotten my wisdom teeth done, so a bit tough to eat for me still) and soo well-marinated! Just the smell of them would do a number on you! It sat on a bed of lettuce, which I was really yearning for (local Hawaiian food does not generally serve up much veg, just a lot of meat, starch and gravy). The tenpura was definitely the star of my plate and I would order this again when revisiting Teshima Restaurant.

Don't worry, eat happy!
-Raechel

Sunday, April 22, 2012

Son of a Gun! It's Matcha!

Today we're saluting matcha green tea powder... the holy baking element that punches a hole in your wallet like a 24 karat fairy dust. Sometimes racking up to $15 per ounce, matcha is made through a crazy process in which only the finest, shade-grown leaves are picked, de-stemmed and deveined and stone ground, a process which can take up to an hour for only 30 grams of the stuff! Talk about labour. But, man-oh-man, it's freakin' beautiful:

Matcha has other purposes besides being used in baked goods. Although it's super fine and pure, I don't think snorting it is  a golden idea.
I must say, in my past baking experience, I tried to get away with baking cakes by using the tea leaves (also called "matcha green tea") in the packets sold at stores. No can do. I even put a sackful in my Magic Bullet in vain hopes of reproducing the powder. It was like watching a five-year old try to drive an Escalade through a Gymboree... sheer hilarity. Not only were my cakes missing the bamboo-green hue of the powder, they were also lacking the quintessential flavour of matcha. Tragedy. First world tragedy, but nonetheless a tragedy. My success began when I finally grabbed the situation by the balls and put my baking before my penny-pinching tendencies (I found a small bottle of culinary matcha--pictured below--at the local Mitsuwa for $6). And boy, was it worth it...


Here's the recipe for ya! (adapted/size-adjusted from here because I made it for a small dinner party and didn't want a monster-sized cake, whose remains would have to sit in the refrigerator waiting for the Cretaceous period.)

Oven at 350*F
Ingredients
  • 1 1/2 c flour
  • 1 1/2 tbsp matcha powder 
  • 1/4 tsp baking powder
  • 1/4 tsp baking soda
  • 1/2 tsp salt
  • 1 stick of unsalted butter, softened (1/2 c)
  • 3/4 c granulated sugar
  • 2 large eggs, room temp
  • 1 tsp vanilla extract
  • 1/2 sour cream or plain yogurt

Sift together flour, baking powder, baking soda, salt and matcha powder. In a separate bowl, cream the butter and sugar. Add vanilla. Beat in the eggs, one at a time. Next: mix or fold in the dry mix. You're ready to bake! Put it in a 9" round or something of a similar size and in the oven she goes for about 30-40 minutes, depending on your oven. Give it the good ol' toothpick test before removing your beautiful cake. Let it cool before turning it out, slicing it, and dressing it with powdered sugar (use a sifter, or else you'll end up with  a hot, chalky mess).


So if you're a dedicated baker and now have this little can of matcha sitting in your cupboard, what else do you do with it? Well, if it's not baking matcha, treat yourself to a cup of tea! You deserve it. OR you can let you imagination fly with it! 

My friend Steven made matcha-frosted cupcakes filled with azuki (bean) for his birthday. Beautiful, no?
 One of my favourite treats with matcha are these suckers:


Yes, matcha macarons! Catherine of TheFoodCult gang helped me (literally) whip up this batch and they were brilliant! Another plus: these babies are gluten-free--almond flour is traditionally used to make macarons rather than all-purpose flour! To add matcha to your macs, just sift it in with the dry mix. Use enough to change the colour of the mix (the colour will also enhance during baking). If desired, you can mix matcha into your ganache, but I highly recommend "dissolving" it in the heated heavy cream first (dissolving it in water will make the fats in the ganache freak out--it's not worth the mess or the emotional distress) as opposed to adding it later.

Did you learn anything? Anything at all? Well, I hope this was a decent introduction to my slightly-expensive and bougie friend matcha powder. If you think of any crazy inventions with the elegant green fairy dust, send them along this way as I'd love to hear them!

Monday, March 26, 2012

Mitsuwa's Santouka Ramen: A Hit!


Mmm! Love my ramen! It's definitely one of the best anywhere, really--my first time at Santouka ramen was actually in Torrance, CA and when I found out there was one in San Diego... STOKED. 

You know how there's that one special item on the menu that you try and you like it so much that you never order anything else ever? The shio-ramen (salt broth) is IT for me. :) Basic and delicious! I like to keep things simple anyways!

The broth is wonderful, noodles are great, there's a good amount of toppings (there could always be more, haha, but this is pretty good) and it's served nice and hot! I'm pretty confident in my assessment of ramen just because I eat a lot of it (and not the instant stuff, mind you!) My other fave place is probably Tajima (oh dear, so good as well!), but Santouka is a wee bit cheaper. The toppings are also vary: Tajima offers egg but Santouka has bamboo!--at both places, you can customise for an additional price though. :)

One drawback: CASH ONLY! 

Other than that, I can't wait to eat these golden noodles again!

Wednesday, November 23, 2011

Cake Decorating!

Oh, it has been too long... since my last post! Except I've been really busy with uni, and that's my excuse! But that doesn't mean that the cooking has stopped, no! 

A little blurb on cake decoration for ya!


My friend, Ashley, and I made this cake for our friends who had their birthdays this past weekend! Awesome, no? If you couldn't tell, it's the house from the Pixar/Disney film Up! The balloons are made from food-coloured french vanilla cupcakes and the cake that makes this house is german chocolate cake. Both were from box recipes because I really wanted to focus on decorating here.

Before laying on the frosting, you should know that you can shape the cake however you'd like! You should also slice/trim the rounded top off of the cake if you want it to lay flat. 
TIP: You can use a knife, fishing string, a clean potter's wire tool, etc... to take off the rounded "muffin top." I used a clean steel guitar string because I was strapped for tools. ^^; If using any of the latter three, be sure to pull it taught and pull it across the cake for a straight trim. Now you can eat the best part of the cake separately. :)

I shaped the roof and dormers on the house before actually frosting it; this took quite a lot of thought because I didn't sketch it out--I recommend doing a quick doodle on some scratch paper before taking to the knife. I used a basic Cutco knife to shave off the corners and cut around the eaves of the roof. The chimney is a separate part made from the shaved off scraps. It was pasted on with frosting. 


The frosting is just regular frosting with food dye, laid on with a spatula/spoon. 

TIP: make sure the cake is properly cooled before you start laying the frosting on--the cake will begin to crumble if it's not cooled. Be patient! 

I split the frosting up into portions, one for each colour I wanted. The roof is done with chocolate frosting. No dye needed there. :) I then applied the light colours first. The thin lines are done with a piping bag--which I didn't actually have.
TIP: you can use a ziploc bag just as easily. I did! Just fill up the inside corner of the bag with the respective frosting, twist the bag to seal it off, and snip off the corner of the bag. How much you snip off depends on how thick you want your line of frosting to be. I snipped off about a quarter to a half of a centimeter. 
Practice piping evenly on some scratch paper before putting the makeshift piping bag to your masterpiece. Squeeze the frosting out with one hand while guiding with your dominant hand.

These really are just basics of what you can do with cake and frosting! Fondant is another popular cake-decorating item. Some people are not fond of the taste or texture of it, but it's very popular among the cake decorating shows. Cream, icing and ganache are more alternatives. Whatever you decorate, be sure to think of the texture you want--if you're baking a cake in the shape of the abominable snowman, how about using shredded dried coconut to bring out the texture? Are you baking a Ferrari-shaped cake? Maybe consider using icing instead! Don't limit yourself to the possibilities! :)

*I should have taken more pictures of the construction, but I honestly did not think this would turn out half as good as it did. Perhaps I'll do it again and do a more thorough how-to, but for now this just has some little decorating tips!

Tuesday, September 20, 2011

Macaron Madness!


Macarons are pretty much the most pretentious cookies on the planet.


I've been obsessing over these little suckers over the past few weeks; I've done about a dozen batches before my mother called her friend to get tips for me! Finally I got a batch that *looked* right! They have the little feet and everything! I adjusted the proportions from several recipes to make smaller batches to just do test runs. Here's my recipe:

1 egg white
40 g almond flour (I just measured sliced almonds out and put it in a my Magic Bullet)
60 g powdered sugar
1.5 tbsp granulated sugar
Piping bag (ziplock bag if you don't have one)
Parchment paper
Oven at 275-300*F

You probably want to make the dry mix first. Do this by measuring out the almonds and blending it with the powdered sugar in a food processor. Next, sift it all out to get a fine powder.
Egg whites! When whipping egg whites, start adding the 1.5 tbsp of sugar when the whites start to foam. Continue the beatings till morale improves. When you pull the beater out of the egg white, the egg white should come up stiff (and not collapse back down). Disaster can also strike if you beat the white too much so be on the alert!

Next, fold the dry mix into your stiffened whites in 4-5 batches. If you're colouring your macarons, put the food colouring in now. Fold enough so it's mixed in and the dry mix is no longer visible, but not too much. If nudged, the dough should slowly sink back down.

Now, fill your piping bag with the macaron mix and pipe little circles onto the parchment paper-lined baking sheets. Leave space in between as they will spread out as they start to rest.

Let stand until film forms over macarons--a "skin" MUST form on the macarons. May take about 30 min. or possibly longer, depending on the humidity of the air; I find it best to make macarons when the weather is relatively dry. Test the macarons by gently touching the surface. If the dough does not stick, you're good to pop it in the oven. Let it bake for about 10-12 minutes.

When checking the macarons, they should have risen a bit to form "feet." They also should come off the parchment paper effortlessly if they're ready. If they're still stuck to the paper, they're not done yet! But watch them closely--if they stay in too long, they could crack, sag, or just get plain rock-hard.
Once again, this is a really pretentious cookie to bake, so don't be discouraged if you don't get 'em right in 10 tries. Seriously. Even professionals struggle with these.

To make a filling, you can use fruit preserve, whipped cream, peanut butter, Nutella or ganache, all which taste great! To make ganache, bring some heavy cream to a simmer and then pour it into a heat-safe bowl of chocolate or white chocolate chips. Stir until even and let it cool off until it's easier to work with. It should be like the consistency of Nutella when it's cool. If it's too liquidy, mix some flour or corn starch in to thicken it.

Fill your macarons with the filling of your choice and then they're free to eat. I have found them best at a day old, as the moisture in the filling seeps into the cookie at that point. Just store them in an air tight container and they're good for a couple days, but I doubt they will last that long! Happy baking! xx

Saturday, September 17, 2011

I do believe I've found a ramen place that tops Asa Ramen... oh dear, I am smitten...

4681 Convoy St., #1, San Diego, CA 92111
(858)576-7244

Tajima is in San Diego county on Convoy, frequently known as the Asian area in SD, where 99 Ranch Market resides. Their website is here.

I had the opportunity to try the ramen with the house broth, topped with the pork belly fat, sliced pork, seaweed, an egg and green onions! Not only was it plenty of food, but the taste was fantastically flavourful and rich and not overly salty! The piece of dried seaweed was actually a nice touch and you can ask for extra if you like. :)

Another bonus is that they give student discounts!! Just bring your ID with you and set it on the table when you order and they'll knock off a percentage! I don't know if you can top a restaurant that pays attention to the fact that us students are actually kinda poor like we say we are!

I do recommend going early if you don't want to wait. The place does start to fill up at around 6 or 6:30 and if you go at peak hours you might have to wait.

Definitely going back to this ramen house for more!

Sunday, September 4, 2011

Food Feature: Eggplant Eggstravaganza!

Ah, the eggplant... or aubergine, as it's known in many places around the world. Apart from being a nice winter colour, it's also a meaty vegetable; when cooked right, I find it's density is a bit like a cooked mushroom. The aubergine comes in many shapes and sizes, but for the most part, eggplants are similar in taste and texture from my experience. It's a funny vegetable that looks nothing like it's cousins, the tomato and the potato, and it's a good source of potassium; some studies have shown that the vitamins in eggplants can help in countering high cholesterol, but it's by no means a treatment on its own.

Another fun factoid off Wikipedia: the eggplant has more nicotine in it than any other edible plant in the world! Somehow I doubt that it's enough to get you hooked, as you'd need to ingest about 20 lbs of eggplant in order to get the same amount of nicotine in a cigarette.


They are mighty-tough buggers to cook! If not done right, eggplants could come out hard or bitter or overly-mushy. They also absorb oil like paper towels without so much as being cooked, so I don't recommend pan-frying them like other veg. Eggplants also don't keep too long, so if you buy some, put it in the fridge to keep them, but I don't recommend letting them stay there for over a day, two at most. They're also emotionally-sensitive vegetables, probably because they're pear-shaped (no shame in this!) and can be easily bruised.

I'm here to share some awesome recipes I've discovered over the past year or so, since I fell in love with the aubergine when my friend Lena treated me to some of her mother's fantastic eggplant lasagna (wish I had THIS recipe!). A cool fact is that most of these recipes, if not all are vegetarian or vegan!


Eggplant Fries
One of my favourite treats are eggplant fries! I may possibly like them more than sweet potato fries; if they don't precede sweet potato fries, then they are a close runner up.

Recipe inspired by a website called userealbutter.com

Ingredients: 
1-2 medium eggplants/aubergines
1 c flour
1/2 tbsp oregano
1/4 tsp pepper
1 tsp kosher/Hawaiian rock salt
1 tsp dry parsley flakes
frying oil
honey
salt to taste

Make a dry mix of 1 cup flour1/2 tbsp oregano, 1/4 tsp pepper, 1 tsp kosher salt and 1 tsp dry parsley flakes. Peel and cut the 1-2 medium eggplant(s) into 3/4 inch thick strips, as long or short as you like and lightly coat them in the flour mix (if it’s too heavily coated, the excess flour will come off in the frying process and ruin your oil). In a saucepan or fryer, add frying oil and heat up. To test the temperature, I like to sprinkle a little bit of flour into the oil; if it starts to bubble, it’s hot enough to start frying your eggplant fries. Fry only a few at a time so the temperature of the oil doesn’t drop too much; I recommend turning them during the process. Take them out when they’re golden (after a minute or so) and set them on paper towels to remove unwanted oil. When they’re done, drizzle with honey and sprinkle salt before serving! (For an herbal twist, substitute lavender seasoning for the honey!)
When I made this for my family, I served this as an appetizer with a Mediterranean-style dinner: Quinoa salad (quinoa, cubed avocado, cubed cucumber, kalamata olives, chopped cherry tomato, olive oil & salt) and a Greek-style chicken dish (chicken cooked in a skillet with a tomato sauce with onions, green peppers and zucchini). The fries absolutely disappeared within minutes! I could almost swear that the lazy susan on the table never stopped spinning because people were constantly turning it to get at these fries. 
Briam
The best way to describe briam, a Greek dish, would be ratatouille. The vegetables in briam can be swapped out depending on the season, so my version has got our star of the show, eggplant, in it!


My favourite recipe for this dish is actually from About.com!

Ingredients: 
1 large eggplant/aubergine
4 large potatoes
Olive Oil
1 medium onion, diced
4 cloves of garlic, minced finely
1/2 c chopped parsley
1 tsp dried basil
a pinch of dried mint
a pinch of oregano
2c tomato sauce
salt & pepper to taste

Boil 4 large potatoes in salted water till tender. When they're done, drop the suckers in a bath of ice water. Take a potato and cut the skin around the center of the potato; the ice water will shrink the peel and let you slip it right off! Repeat on the rest of the potatoes. Next, slice the potatoes into 1/4 inch rounds and set it aside.

In a saucepan, heat up 1/2 c olive oil and saute the 1 diced medium onion until they are translucent. Add minced garlic (4 cloves should do it). Saute for another minute. The smell will be fantastic! Optional: add 1/2 c wine and cook it off for a few minutes.

Next, add your herbs: 1/2 c chopped parsley, a tsp of dried basil, a pinch of dried mint, a pinch of oregano (this isn't in the original recipe, but I like a bit of it in my briam). Once that's stirred in, add 2 c tomato sauce and 1/2 c water. Bring all this to a boil, cover with lid and simmer for 15 min or so.

Slice up 4 large tomatoes to whatever thickness you prefer and set aside. I like them at about 1/3-1/4 inch thickness.

If your oven needs preheating, go ahead and switch it to 425ºF. While your sauce is cooking, grab a baking pan! Drizzle some olive oil at the bottom and start lining about half of the potato slices in the pan. Grab your salt and season the potatoes lightly. For the next layer, cover the potatoes with your tomato slices. Season with salt and pepper. Time for another layer of potatoes! By now, you should be using up the rest of your potato slices. Season again and when your sauce is done, go ahead and spoon about half of it over your potatoes and tomatoes.

For the next layer I like to switch off the zucchini for eggplant. Just a personal preference. :) Slice up 1 large aubergine/eggplant to about 1/4 inch thickness and to ahead and layer it on top of the sauce. Top it off with the rest of your sauce. and pop your baking pan into the oven; let it roast till the vegetables are tender. It generally takes about an hour, but watch it so the top doesn't burn. Since your potatoes are cooked, your eggplant will determine the readiness of the dish. Take a fork and poke at the eggplant layer; it should be soft and tender, but not mushy.
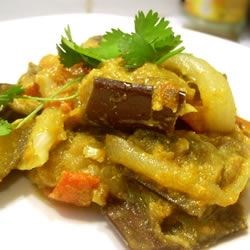


Baigan Bharta
Since the eggplant is native to India, we should probably see how it's done in that region, no? Baigan bharta is basically an eggplant curry and I'll just link the recipe since I didn't change anything in it. Here it is!

One thing I do recommend though, is adding a bit more salt; I found myself needing to add it as I was eating. I also have to say, it's funny baking the eggplant. If you fork it to test it's tenderness, it'll emit steam like an angry cartoon character; super entertaining! It's also really strange peeling the eggplant; I've never done anything quite like that to be honest.


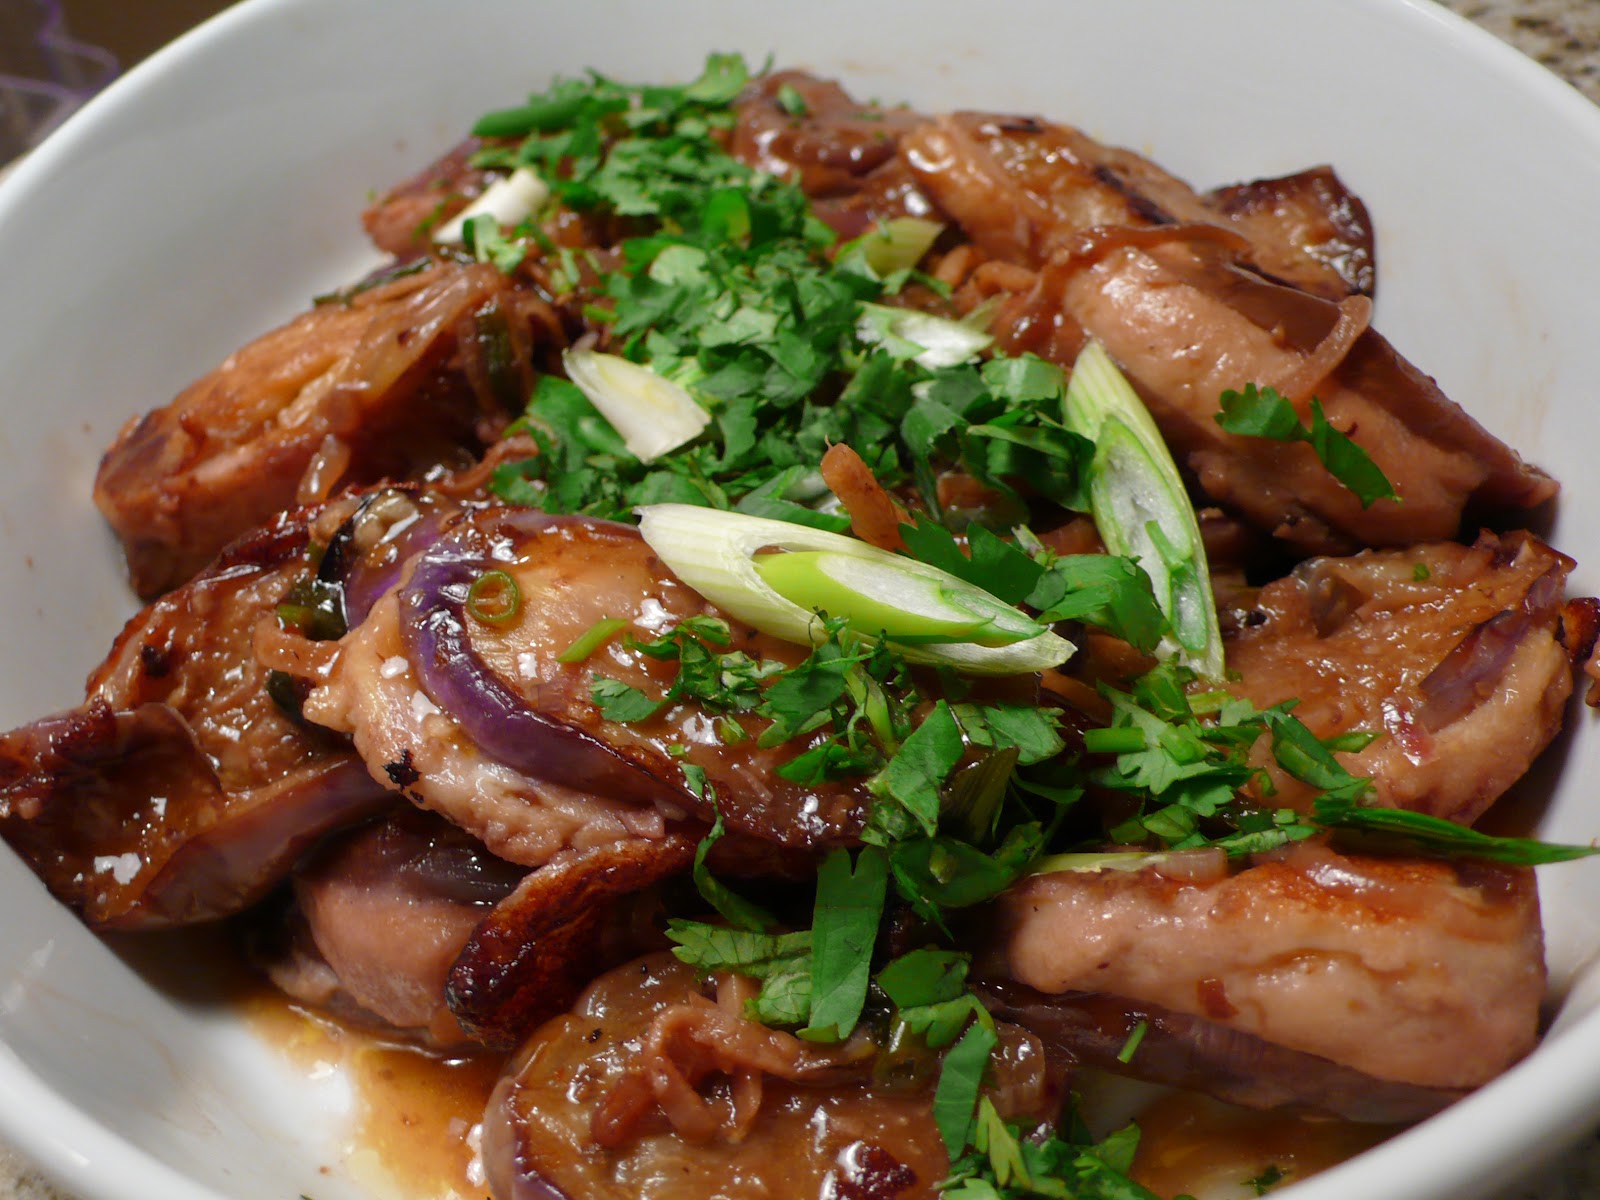
Chinese-Style Eggplant Dishes
Chinese eggplants are different from the plumper eggplants you generally see in western supermarkets; they are longer and slimmer, making for easier slicing. Though I'm yet to cook this dish myself, I have to recommend a common dim-sum dish that features Chinese eggplant. It's eggplant that's stuffed with mince fish, battered and deep fried. Generally a sauce is added to it; at today's dim sum, I had stuffed eggplant accompanied by a black bean sauce. Yum! 

In my travels, I've also come across braised eggplant. In Beijing, China, one of the restaurants right outside the Forbidden City had braised eggplant on the menu; when trying to figure out what to order for my friends my eyes stopped at 紅燒 (hong shao), the Chinese word for braised. To say the least, 紅燒茄子 (hong shao qie zi) turned out to be a hit! Braised in a red sauce, it was sweet and really tasty; the dish disappeared quickly among my non-Chinese friends. To be honest, I'm not even sure they knew what it was, but they loved it anyway. :) 


Well, that's about all for today! Huzzah for aubergines! There are tons of other possibilities in the eggplant world yet to be explored! Please feel free to share any in the comments section! Happy eggplanting--well, don't go out planting eggs... I doubt you'll get a tree that blossoms chickens or a bush that sprouts eggs.