Friday, November 9, 2012

The Best Piña Colada Cupcakes You'll Ever Have!

Seriously though… the coconut cream and the pineapple hibiscus on top? Superfly.

image

I adapted Carrot Top Mom’s absolutely fantastic coconut cupcake recipe after making it with my roommates! I had done a bake sale the week before with sold out piña colada cupcakes, but I wasn’t done trying new things so after having experienced the nirvana of Carrot Tom Mom’s recipe, I decided to put my own twist on it!

image

Another neat trick? DIY cupcake stand! 2 plates and a cup couldn’t be happier! Mismatch them or find similar colours, it all looks great! 

You’ll need a can of coconut milk (ideally full-fat is best). If you can put it in the fridge the day before, that’d be great, if not, 20 min in the freezer will suffice as coconut milk/oil has a low-temp state of change. You basically want the cream in the milk to separate from the water, giving you a beautiful glossy cream to work with and a flavourful coconut water to add to the cupcakes. So now you’re probably waiting and I’ll give you the DL on it!
Preheat oven to 350*F
Ingredients:
  • 2 c. flour (all purpose is just fine)
  • 1/2 tsp salt
  • 2 1/4 tsp baking powder
  • 1 1/2 sticks of butter
  • 1 1/3 c. granulated sugar
  • 3 large eggs
  • 1/2 tsp. vanilla extract
  • 1 can of coconut milk (leftover from frosting—see below)
  • 1/2 can of pineapple chunks (juice sieved out or patted dry)
  • 2 c. powdered sugar (for the frosting)
  • Maraschino cherries with stems 
  • 1 whole pineapple 
Let’s do the flower!
  • Slice the husk off the pineapple (don’t worry if it’s not round) and proceed to slice  rounds that are approximately 1/3 of a centimeter thick. Dry them out in the oven (350* is fine) on a baking sheet lined with foil or parchment paper (try to dry them out on both sides) and bake them until the edges turn golden.
  • With a knife put a small hole in the center for the stem of a maraschino cherry to go through. Set them aside in a dry place.
image

I recommend prepping the coconut milk before making the batter so you have your coconut water to use for the cupcake batter. Leggo! 
  • After letting your trusty can of coconut milk sit in the freezer for 20 min (or in the fridge overnight), carefully pull it out without tossing it about or turning it upside down. Open the can and take the cream from the top that has collected, transferring it into a mixing bowl; take as much of it as you can without getting any of the “coconut water” at the bottom. Ideally, 2/3 of the can will have turned into cream, leaving 1/3 of the can (mostly coconut water) for your cupcakes. Save the remainder in the can, and put the bowl of cream aside.
Let’s get started on the cupcakes!
  • Sift together the flour, salt & baking powder
  • In a separate bowl, cream the butter and granulated sugar together. Add one egg at a time as you mix and then add the vanilla. 
  • Into the wet mix, alternate adding 1/3 of the dry mix and 1/2 of the coconut water from the can and mix—do not over mix! Just mix until the flour is all incorporated. You should finish by mixing the last 1/3 of the dry mix in. 
  • Good work! Now you batter is thickened and ready for the pineapple aspect of the cakes! Get the pineapple chunks that you’ve patted dry and FOLD them in with a spatula. Try not to mix too much! You don’t want to ruin the batter. Fold until evenly incorporated. 
  • Get your batter into the cupcake liners & tins now. I recommend going 2/3 up. 
  • With your oven preheated to 350*F, put the tins in and bake for 10-15 min or until an inserted toothpick comes out fairly clean.
    image
Frosting!
  • Now that you’re patiently waiting for the cupcakes to happen, go ahead and work on the frosting. Get the cream that you’ve collected from the can and whip it with an electric mixer until fluffy. Introduce about 2 cups of powdered sugar and whip it in. Taste as you go, just in case you don’t want it too sweet. Also feel free to add more. If you’re not frosting them right away, go ahead and put the frosting into the fridge. 


image

When the cupcakes have cooled remove a small section in the middle to fit the maraschino cherry (you can use a grapefruit spoon or a small melon-baller). Now you can frost them using a spatula or a spoon. Insert the cherry and then when adding the pineapple petals, insert the cherry’s stem through the hole you made in the flower. Voila!

image

Monday, November 5, 2012

SoCal Chili


It's fall! What's better than some chili for those cool breezy nights? Plus, it's an excuse to bake some cornbread. ;) 
My roommate recently bought some black beans that she couldn’t use, so she gave them to me and I needed to come up with a recipe that I could use them in. I also had some bacon ends and bits that I just bought because… because of reasons. All of my housemates are on a health kick so when I shop with them, I tend to buy all veggies and produce and whatnot. But my real self jumped out momentarily and tossed a bag of bacon ends and bits into my cart. I’m glad she’s still around because it really changes everything about this chili! (For a vegetarian take, see below*)
I also had some colourful bell peppers that were just shouting to be cooked. They really are so gorgeous. And the sweetness is INSANE with the smokiness of this chili. And what more could you want other than some fresh California avocado, spring onions, cheese and sour cream to dress it up? Here’s my take on chili!:
Serves 6
What you’ll need:
  • 2 medium onions (diced)
  • 1/4 olive oil
  • 1 handful of bacon bits and ends (you can pick this up from Trader Joe’s for cheap!), and of course, you can leave this out if you're making a vegetarian dish
  • 2 med bell peppers (I used 1 yellow and 1 orange) chopped coarsely
  • 6 cloves of garlic chopped
  • 1/2 tsp of cayenne/red pepper
  • 2 tsp oregano (dried)
  • 1 tsp of BBQ rub
  • 1 1/2 tsp of ground cumin
  • 3 cans of black beans
  • 1 can (15 or 16oz) of tomato sauce
  • 1 ripe avocado (cubed)
Cook the bacon bits and ends in a pot on the stove on medium while you chop the onions, peppers and garlic. Once the smell has properly saturated the room (a few minutes), add the olive oil. Wait about a minute to let the oil heat up and then add the peppers, onions and garlic. Stir frequently while waiting for the onions to turn a bit translucent (5 min or so), bring it down to a simmer, and then add the cayenne, oregano, rub and cumin and stir to allow the spices to meld. After a couple minutes, add the beans with 1/2c of the liquid reserve. Mix in the tomato sauce and let the chili come to a boil (bring it back up to medium). When it starts boiling, bring it back down to a simmer and let it reduce for 15-20 min. Stir frequently. Salt to taste (I didn’t need to add any more flavour, but add it to your liking) and then serve with some grated cheese (I’m partial to Asiago) and top with avocado cubes. Enjoy! 

Sunday, November 4, 2012

Published in Ruche's Sugar & Spice


Hey readers! I'm delighted to share that I've been featured in Ruche's cookbook Sugar & Spice! Get my macaron recipe and many others right here!:

Thursday, September 20, 2012

A Warm Summer Night's Dinner


Time for more foodventures! This time, I teamed up with Titowpuente to create a feast of sorts for my family. We went Hawaiian-Japanese for the themed dinner.


That day was particular scorching as the tail end of the Indian summer wound up for it’s final pitch. We nearly canceled our cooking session because turning on the stove and oven would only increase the temperature, right? We resorted to a cooler meal: instead of slaving over the stove massaging arborio rice into risotto, we decided to go with a cold somen salad, with yakitori for a side. 


It took quite a while, the whole endeavour, as we had to hit the supermarkets (this meal required a special trip to the Asian market to get kamaboko, or fishcake), but it was very much worth it and there was plenty of food for all! 


Want to duplicate the dinner? Here you go:
Just a tip: For the teriyaki sauce that the yakitori recipe asks you to make, I would half the measurements so you won’t have so much leftover. :) Also, in addition to chicken, we added tasty chicken liver onto the skewers. Delicious!

Puff City!

Image from Big Island Grinds
My last trip to Hawaii brought me to a little hole-in-the-wall pastry shop called Puff City. The hype on Yelp as well as hype from an uncle of mine got me to the humble establishment at a honking 6am! First of all, I am not, by any means, a morning person, so you can imagine how important this foodie trip was for me. Or you can imagine the fear of getting there at 8am and only being able to grab what's left! Anyways, now you reap the rich rewards of my puffy reviews as well as that of my puffy ego. Here you go!:

Lilikoi (passion fruit) Mousse- exquisite! Definitely my favourite puff of them all; with rave reviews of it on Yelp and and awarded most-popular-puff from Michael at Puff City, that seemed to be the flagship puff that simply doesn't mess around. Coated in a lilikoi ganache, it really does earn its esteem: light and fragrant, it captures the essence of the fruit without compromising in sweetness (far too many lilikoi products are overloaded with sugar).

Lychee- delightful! The mousse is literally like a flower, being very aromatic. Much of the lychee fruit's sweetness and character is in it's juicy and somewhat meaty pulp. While a pastry can't really capture that, the lychee puff does maintain the floral fragrance of the tropics-loving fruit. It makes me hungry for more possibilities of flower-scented morsels; reminds me of rose and lavender gelato I had in Nice, France. :)

Coffee Mousse with Chocolate Ganache & Heath Bar Bits- the highlight of this puff is the coffee mousse! Accompanied by the chocolate ganache, this puff has a good marriage of flavour... and then you get to the toffee, which really sells this puff. I would almost like to see what Puff City could do with a sea salt caramel puff. :)

Coconut Mousse with Chocolate Ganache- the coconut flavour in this isn't as strong as it would be in haupia (a Hawaiian coconut milk pudding), but I respect it as an artistic choice. Nonetheless, the coconut scent still shines through in this puff. The shredded coconut marries the puff together amidst the chocolate ganache (which is a tad bit overpowering)--the trick is to take a whiff of the shredded coconut with your bite (like the strawberry daiquiri at the Noble Experiment in San Diego).

Mocha Rum- the rum flavour is evident in the mousse and the mocha is subtle behind the rum. I do find that this puff relies heavily on the ganache for its taste.

Thursday, July 19, 2012

Teshima Restaurant- Kailua-Kona, Hawaii


Teshima Restaurant (located at 79-7251 Mamalahoa Hwy, Kealakekua, HI 96750) is a family restaurant, with 3 generations currently working in the Japanese-style joint. Shizu-Obaachan, who recently turned 107, is still running the place as cheerfully as ever. It's a little in the middle of nowhere on the Kailua-Kona-side of the Big Island, but if you're in the area and want a nice lunch or dinner, stop here!

Price: $$
Overall Experience: 4 stars/5 stars

Teshima is best known for their tenpura/tempura, or Japanese battered and deep fried foods dipped in a brothy-sauce, so naturally I had to sample this on my first trip to the restaurant. ("What the Big Island Likes to Eat" highly recommends the kettle-cooked tofu dish and I can say that was also fantastic--my huge family ordered basically half the menu, so I had a good go at everything.) I ordered the Thursday lunch special, which comes with a cup of miso soup, a tray of pickled veg, a bowl of rice, barley tea, a side of really tasty and well-marinated spare ribs and gorgeous platter of golden tenpura. The tenpura was traditionally done and perfect--not over or undercooked, not too oily, great colour, etc... Teshima served up these things in my tenpura: ahi, yam, zucchini, eggplant, green bean and a lovely surprise of purple potato! Look at that colour!:

The dipping sauce was also great, not overly salty, with a nice sweetness. The spareribs were magnificent (I'd just gotten my wisdom teeth done, so a bit tough to eat for me still) and soo well-marinated! Just the smell of them would do a number on you! It sat on a bed of lettuce, which I was really yearning for (local Hawaiian food does not generally serve up much veg, just a lot of meat, starch and gravy). The tenpura was definitely the star of my plate and I would order this again when revisiting Teshima Restaurant.

Don't worry, eat happy!
-Raechel

Sunday, April 22, 2012

Son of a Gun! It's Matcha!

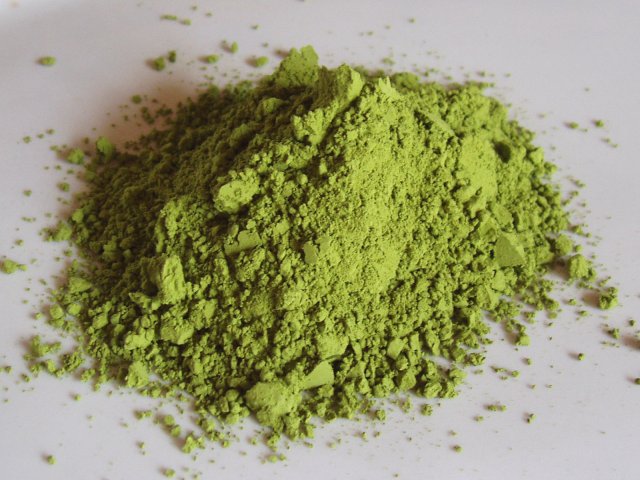
Today we're saluting matcha green tea powder... the holy baking element that punches a hole in your wallet like a 24 karat fairy dust. Sometimes racking up to $15 per ounce, matcha is made through a crazy process in which only the finest, shade-grown leaves are picked, de-stemmed and deveined and stone ground, a process which can take up to an hour for only 30 grams of the stuff! Talk about labour. But, man-oh-man, it's freakin' beautiful:

Matcha has other purposes besides being used in baked goods. Although it's super fine and pure, I don't think snorting it is  a golden idea.
I must say, in my past baking experience, I tried to get away with baking cakes by using the tea leaves (also called "matcha green tea") in the packets sold at stores. No can do. I even put a sackful in my Magic Bullet in vain hopes of reproducing the powder. It was like watching a five-year old try to drive an Escalade through a Gymboree... sheer hilarity. Not only were my cakes missing the bamboo-green hue of the powder, they were also lacking the quintessential flavour of matcha. Tragedy. First world tragedy, but nonetheless a tragedy. My success began when I finally grabbed the situation by the balls and put my baking before my penny-pinching tendencies (I found a small bottle of culinary matcha--pictured below--at the local Mitsuwa for $6). And boy, was it worth it...


Here's the recipe for ya! (adapted/size-adjusted from here because I made it for a small dinner party and didn't want a monster-sized cake, whose remains would have to sit in the refrigerator waiting for the Cretaceous period.)

Oven at 350*F
Ingredients
  • 1 1/2 c flour
  • 1 1/2 tbsp matcha powder 
  • 1/4 tsp baking powder
  • 1/4 tsp baking soda
  • 1/2 tsp salt
  • 1 stick of unsalted butter, softened (1/2 c)
  • 3/4 c granulated sugar
  • 2 large eggs, room temp
  • 1 tsp vanilla extract
  • 1/2 sour cream or plain yogurt

Sift together flour, baking powder, baking soda, salt and matcha powder. In a separate bowl, cream the butter and sugar. Add vanilla. Beat in the eggs, one at a time. Next: mix or fold in the dry mix. You're ready to bake! Put it in a 9" round or something of a similar size and in the oven she goes for about 30-40 minutes, depending on your oven. Give it the good ol' toothpick test before removing your beautiful cake. Let it cool before turning it out, slicing it, and dressing it with powdered sugar (use a sifter, or else you'll end up with  a hot, chalky mess).


So if you're a dedicated baker and now have this little can of matcha sitting in your cupboard, what else do you do with it? Well, if it's not baking matcha, treat yourself to a cup of tea! You deserve it. OR you can let you imagination fly with it! 

My friend Steven made matcha-frosted cupcakes filled with azuki (bean) for his birthday. Beautiful, no?
 One of my favourite treats with matcha are these suckers:


Yes, matcha macarons! Catherine of TheFoodCult gang helped me (literally) whip up this batch and they were brilliant! Another plus: these babies are gluten-free--almond flour is traditionally used to make macarons rather than all-purpose flour! To add matcha to your macs, just sift it in with the dry mix. Use enough to change the colour of the mix (the colour will also enhance during baking). If desired, you can mix matcha into your ganache, but I highly recommend "dissolving" it in the heated heavy cream first (dissolving it in water will make the fats in the ganache freak out--it's not worth the mess or the emotional distress) as opposed to adding it later.

Did you learn anything? Anything at all? Well, I hope this was a decent introduction to my slightly-expensive and bougie friend matcha powder. If you think of any crazy inventions with the elegant green fairy dust, send them along this way as I'd love to hear them!

Monday, March 26, 2012

Mitsuwa's Santouka Ramen: A Hit!


Mmm! Love my ramen! It's definitely one of the best anywhere, really--my first time at Santouka ramen was actually in Torrance, CA and when I found out there was one in San Diego... STOKED. 

You know how there's that one special item on the menu that you try and you like it so much that you never order anything else ever? The shio-ramen (salt broth) is IT for me. :) Basic and delicious! I like to keep things simple anyways!

The broth is wonderful, noodles are great, there's a good amount of toppings (there could always be more, haha, but this is pretty good) and it's served nice and hot! I'm pretty confident in my assessment of ramen just because I eat a lot of it (and not the instant stuff, mind you!) My other fave place is probably Tajima (oh dear, so good as well!), but Santouka is a wee bit cheaper. The toppings are also vary: Tajima offers egg but Santouka has bamboo!--at both places, you can customise for an additional price though. :)

One drawback: CASH ONLY! 

Other than that, I can't wait to eat these golden noodles again!

Wednesday, November 23, 2011

Cake Decorating!

Oh, it has been too long... since my last post! Except I've been really busy with uni, and that's my excuse! But that doesn't mean that the cooking has stopped, no! 

A little blurb on cake decoration for ya!


My friend, Ashley, and I made this cake for our friends who had their birthdays this past weekend! Awesome, no? If you couldn't tell, it's the house from the Pixar/Disney film Up! The balloons are made from food-coloured french vanilla cupcakes and the cake that makes this house is german chocolate cake. Both were from box recipes because I really wanted to focus on decorating here.

Before laying on the frosting, you should know that you can shape the cake however you'd like! You should also slice/trim the rounded top off of the cake if you want it to lay flat. 
TIP: You can use a knife, fishing string, a clean potter's wire tool, etc... to take off the rounded "muffin top." I used a clean steel guitar string because I was strapped for tools. ^^; If using any of the latter three, be sure to pull it taught and pull it across the cake for a straight trim. Now you can eat the best part of the cake separately. :)

I shaped the roof and dormers on the house before actually frosting it; this took quite a lot of thought because I didn't sketch it out--I recommend doing a quick doodle on some scratch paper before taking to the knife. I used a basic Cutco knife to shave off the corners and cut around the eaves of the roof. The chimney is a separate part made from the shaved off scraps. It was pasted on with frosting. 


The frosting is just regular frosting with food dye, laid on with a spatula/spoon. 

TIP: make sure the cake is properly cooled before you start laying the frosting on--the cake will begin to crumble if it's not cooled. Be patient! 

I split the frosting up into portions, one for each colour I wanted. The roof is done with chocolate frosting. No dye needed there. :) I then applied the light colours first. The thin lines are done with a piping bag--which I didn't actually have.
TIP: you can use a ziploc bag just as easily. I did! Just fill up the inside corner of the bag with the respective frosting, twist the bag to seal it off, and snip off the corner of the bag. How much you snip off depends on how thick you want your line of frosting to be. I snipped off about a quarter to a half of a centimeter. 
Practice piping evenly on some scratch paper before putting the makeshift piping bag to your masterpiece. Squeeze the frosting out with one hand while guiding with your dominant hand.

These really are just basics of what you can do with cake and frosting! Fondant is another popular cake-decorating item. Some people are not fond of the taste or texture of it, but it's very popular among the cake decorating shows. Cream, icing and ganache are more alternatives. Whatever you decorate, be sure to think of the texture you want--if you're baking a cake in the shape of the abominable snowman, how about using shredded dried coconut to bring out the texture? Are you baking a Ferrari-shaped cake? Maybe consider using icing instead! Don't limit yourself to the possibilities! :)

*I should have taken more pictures of the construction, but I honestly did not think this would turn out half as good as it did. Perhaps I'll do it again and do a more thorough how-to, but for now this just has some little decorating tips!

Tuesday, September 20, 2011

Macaron Madness!


Macarons are pretty much the most pretentious cookies on the planet.


I've been obsessing over these little suckers over the past few weeks; I've done about a dozen batches before my mother called her friend to get tips for me! Finally I got a batch that *looked* right! They have the little feet and everything! I adjusted the proportions from several recipes to make smaller batches to just do test runs. Here's my recipe:

1 egg white
40 g almond flour (I just measured sliced almonds out and put it in a my Magic Bullet)
60 g powdered sugar
1.5 tbsp granulated sugar
Piping bag (ziplock bag if you don't have one)
Parchment paper
Oven at 275-300*F

You probably want to make the dry mix first. Do this by measuring out the almonds and blending it with the powdered sugar in a food processor. Next, sift it all out to get a fine powder.
Egg whites! When whipping egg whites, start adding the 1.5 tbsp of sugar when the whites start to foam. Continue the beatings till morale improves. When you pull the beater out of the egg white, the egg white should come up stiff (and not collapse back down). Disaster can also strike if you beat the white too much so be on the alert!

Next, fold the dry mix into your stiffened whites in 4-5 batches. If you're colouring your macarons, put the food colouring in now. Fold enough so it's mixed in and the dry mix is no longer visible, but not too much. If nudged, the dough should slowly sink back down.

Now, fill your piping bag with the macaron mix and pipe little circles onto the parchment paper-lined baking sheets. Leave space in between as they will spread out as they start to rest.

Let stand until film forms over macarons--a "skin" MUST form on the macarons. May take about 30 min. or possibly longer, depending on the humidity of the air; I find it best to make macarons when the weather is relatively dry. Test the macarons by gently touching the surface. If the dough does not stick, you're good to pop it in the oven. Let it bake for about 10-12 minutes.

When checking the macarons, they should have risen a bit to form "feet." They also should come off the parchment paper effortlessly if they're ready. If they're still stuck to the paper, they're not done yet! But watch them closely--if they stay in too long, they could crack, sag, or just get plain rock-hard.
Once again, this is a really pretentious cookie to bake, so don't be discouraged if you don't get 'em right in 10 tries. Seriously. Even professionals struggle with these.

To make a filling, you can use fruit preserve, whipped cream, peanut butter, Nutella or ganache, all which taste great! To make ganache, bring some heavy cream to a simmer and then pour it into a heat-safe bowl of chocolate or white chocolate chips. Stir until even and let it cool off until it's easier to work with. It should be like the consistency of Nutella when it's cool. If it's too liquidy, mix some flour or corn starch in to thicken it.

Fill your macarons with the filling of your choice and then they're free to eat. I have found them best at a day old, as the moisture in the filling seeps into the cookie at that point. Just store them in an air tight container and they're good for a couple days, but I doubt they will last that long! Happy baking! xx

Saturday, September 17, 2011

I do believe I've found a ramen place that tops Asa Ramen... oh dear, I am smitten...

4681 Convoy St., #1, San Diego, CA 92111
(858)576-7244

Tajima is in San Diego county on Convoy, frequently known as the Asian area in SD, where 99 Ranch Market resides. Their website is here.

I had the opportunity to try the ramen with the house broth, topped with the pork belly fat, sliced pork, seaweed, an egg and green onions! Not only was it plenty of food, but the taste was fantastically flavourful and rich and not overly salty! The piece of dried seaweed was actually a nice touch and you can ask for extra if you like. :)

Another bonus is that they give student discounts!! Just bring your ID with you and set it on the table when you order and they'll knock off a percentage! I don't know if you can top a restaurant that pays attention to the fact that us students are actually kinda poor like we say we are!

I do recommend going early if you don't want to wait. The place does start to fill up at around 6 or 6:30 and if you go at peak hours you might have to wait.

Definitely going back to this ramen house for more!

Sunday, September 4, 2011

Food Feature: Eggplant Eggstravaganza!

Ah, the eggplant... or aubergine, as it's known in many places around the world. Apart from being a nice winter colour, it's also a meaty vegetable; when cooked right, I find it's density is a bit like a cooked mushroom. The aubergine comes in many shapes and sizes, but for the most part, eggplants are similar in taste and texture from my experience. It's a funny vegetable that looks nothing like it's cousins, the tomato and the potato, and it's a good source of potassium; some studies have shown that the vitamins in eggplants can help in countering high cholesterol, but it's by no means a treatment on its own.

Another fun factoid off Wikipedia: the eggplant has more nicotine in it than any other edible plant in the world! Somehow I doubt that it's enough to get you hooked, as you'd need to ingest about 20 lbs of eggplant in order to get the same amount of nicotine in a cigarette.


They are mighty-tough buggers to cook! If not done right, eggplants could come out hard or bitter or overly-mushy. They also absorb oil like paper towels without so much as being cooked, so I don't recommend pan-frying them like other veg. Eggplants also don't keep too long, so if you buy some, put it in the fridge to keep them, but I don't recommend letting them stay there for over a day, two at most. They're also emotionally-sensitive vegetables, probably because they're pear-shaped (no shame in this!) and can be easily bruised.

I'm here to share some awesome recipes I've discovered over the past year or so, since I fell in love with the aubergine when my friend Lena treated me to some of her mother's fantastic eggplant lasagna (wish I had THIS recipe!). A cool fact is that most of these recipes, if not all are vegetarian or vegan!


Eggplant Fries
One of my favourite treats are eggplant fries! I may possibly like them more than sweet potato fries; if they don't precede sweet potato fries, then they are a close runner up.

Recipe inspired by a website called userealbutter.com

Ingredients: 
1-2 medium eggplants/aubergines
1 c flour
1/2 tbsp oregano
1/4 tsp pepper
1 tsp kosher/Hawaiian rock salt
1 tsp dry parsley flakes
frying oil
honey
salt to taste

Make a dry mix of 1 cup flour1/2 tbsp oregano, 1/4 tsp pepper, 1 tsp kosher salt and 1 tsp dry parsley flakes. Peel and cut the 1-2 medium eggplant(s) into 3/4 inch thick strips, as long or short as you like and lightly coat them in the flour mix (if it’s too heavily coated, the excess flour will come off in the frying process and ruin your oil). In a saucepan or fryer, add frying oil and heat up. To test the temperature, I like to sprinkle a little bit of flour into the oil; if it starts to bubble, it’s hot enough to start frying your eggplant fries. Fry only a few at a time so the temperature of the oil doesn’t drop too much; I recommend turning them during the process. Take them out when they’re golden (after a minute or so) and set them on paper towels to remove unwanted oil. When they’re done, drizzle with honey and sprinkle salt before serving! (For an herbal twist, substitute lavender seasoning for the honey!)
When I made this for my family, I served this as an appetizer with a Mediterranean-style dinner: Quinoa salad (quinoa, cubed avocado, cubed cucumber, kalamata olives, chopped cherry tomato, olive oil & salt) and a Greek-style chicken dish (chicken cooked in a skillet with a tomato sauce with onions, green peppers and zucchini). The fries absolutely disappeared within minutes! I could almost swear that the lazy susan on the table never stopped spinning because people were constantly turning it to get at these fries. 
Briam
The best way to describe briam, a Greek dish, would be ratatouille. The vegetables in briam can be swapped out depending on the season, so my version has got our star of the show, eggplant, in it!


My favourite recipe for this dish is actually from About.com!

Ingredients: 
1 large eggplant/aubergine
4 large potatoes
Olive Oil
1 medium onion, diced
4 cloves of garlic, minced finely
1/2 c chopped parsley
1 tsp dried basil
a pinch of dried mint
a pinch of oregano
2c tomato sauce
salt & pepper to taste

Boil 4 large potatoes in salted water till tender. When they're done, drop the suckers in a bath of ice water. Take a potato and cut the skin around the center of the potato; the ice water will shrink the peel and let you slip it right off! Repeat on the rest of the potatoes. Next, slice the potatoes into 1/4 inch rounds and set it aside.

In a saucepan, heat up 1/2 c olive oil and saute the 1 diced medium onion until they are translucent. Add minced garlic (4 cloves should do it). Saute for another minute. The smell will be fantastic! Optional: add 1/2 c wine and cook it off for a few minutes.

Next, add your herbs: 1/2 c chopped parsley, a tsp of dried basil, a pinch of dried mint, a pinch of oregano (this isn't in the original recipe, but I like a bit of it in my briam). Once that's stirred in, add 2 c tomato sauce and 1/2 c water. Bring all this to a boil, cover with lid and simmer for 15 min or so.

Slice up 4 large tomatoes to whatever thickness you prefer and set aside. I like them at about 1/3-1/4 inch thickness.

If your oven needs preheating, go ahead and switch it to 425ºF. While your sauce is cooking, grab a baking pan! Drizzle some olive oil at the bottom and start lining about half of the potato slices in the pan. Grab your salt and season the potatoes lightly. For the next layer, cover the potatoes with your tomato slices. Season with salt and pepper. Time for another layer of potatoes! By now, you should be using up the rest of your potato slices. Season again and when your sauce is done, go ahead and spoon about half of it over your potatoes and tomatoes.

For the next layer I like to switch off the zucchini for eggplant. Just a personal preference. :) Slice up 1 large aubergine/eggplant to about 1/4 inch thickness and to ahead and layer it on top of the sauce. Top it off with the rest of your sauce. and pop your baking pan into the oven; let it roast till the vegetables are tender. It generally takes about an hour, but watch it so the top doesn't burn. Since your potatoes are cooked, your eggplant will determine the readiness of the dish. Take a fork and poke at the eggplant layer; it should be soft and tender, but not mushy.


Baigan Bharta
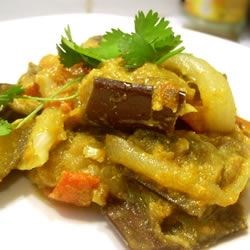
Since the eggplant is native to India, we should probably see how it's done in that region, no? Baigan bharta is basically an eggplant curry and I'll just link the recipe since I didn't change anything in it. Here it is!

One thing I do recommend though, is adding a bit more salt; I found myself needing to add it as I was eating. I also have to say, it's funny baking the eggplant. If you fork it to test it's tenderness, it'll emit steam like an angry cartoon character; super entertaining! It's also really strange peeling the eggplant; I've never done anything quite like that to be honest.


Chinese-Style Eggplant Dishes
Chinese eggplants are different from the plumper eggplants you generally see in western supermarkets; they are longer and slimmer, making for easier slicing. Though I'm yet to cook this dish myself, I have to recommend a common dim-sum dish that features Chinese eggplant. It's eggplant that's stuffed with mince fish, battered and deep fried. Generally a sauce is added to it; at today's dim sum, I had stuffed eggplant accompanied by a black bean sauce. Yum! 

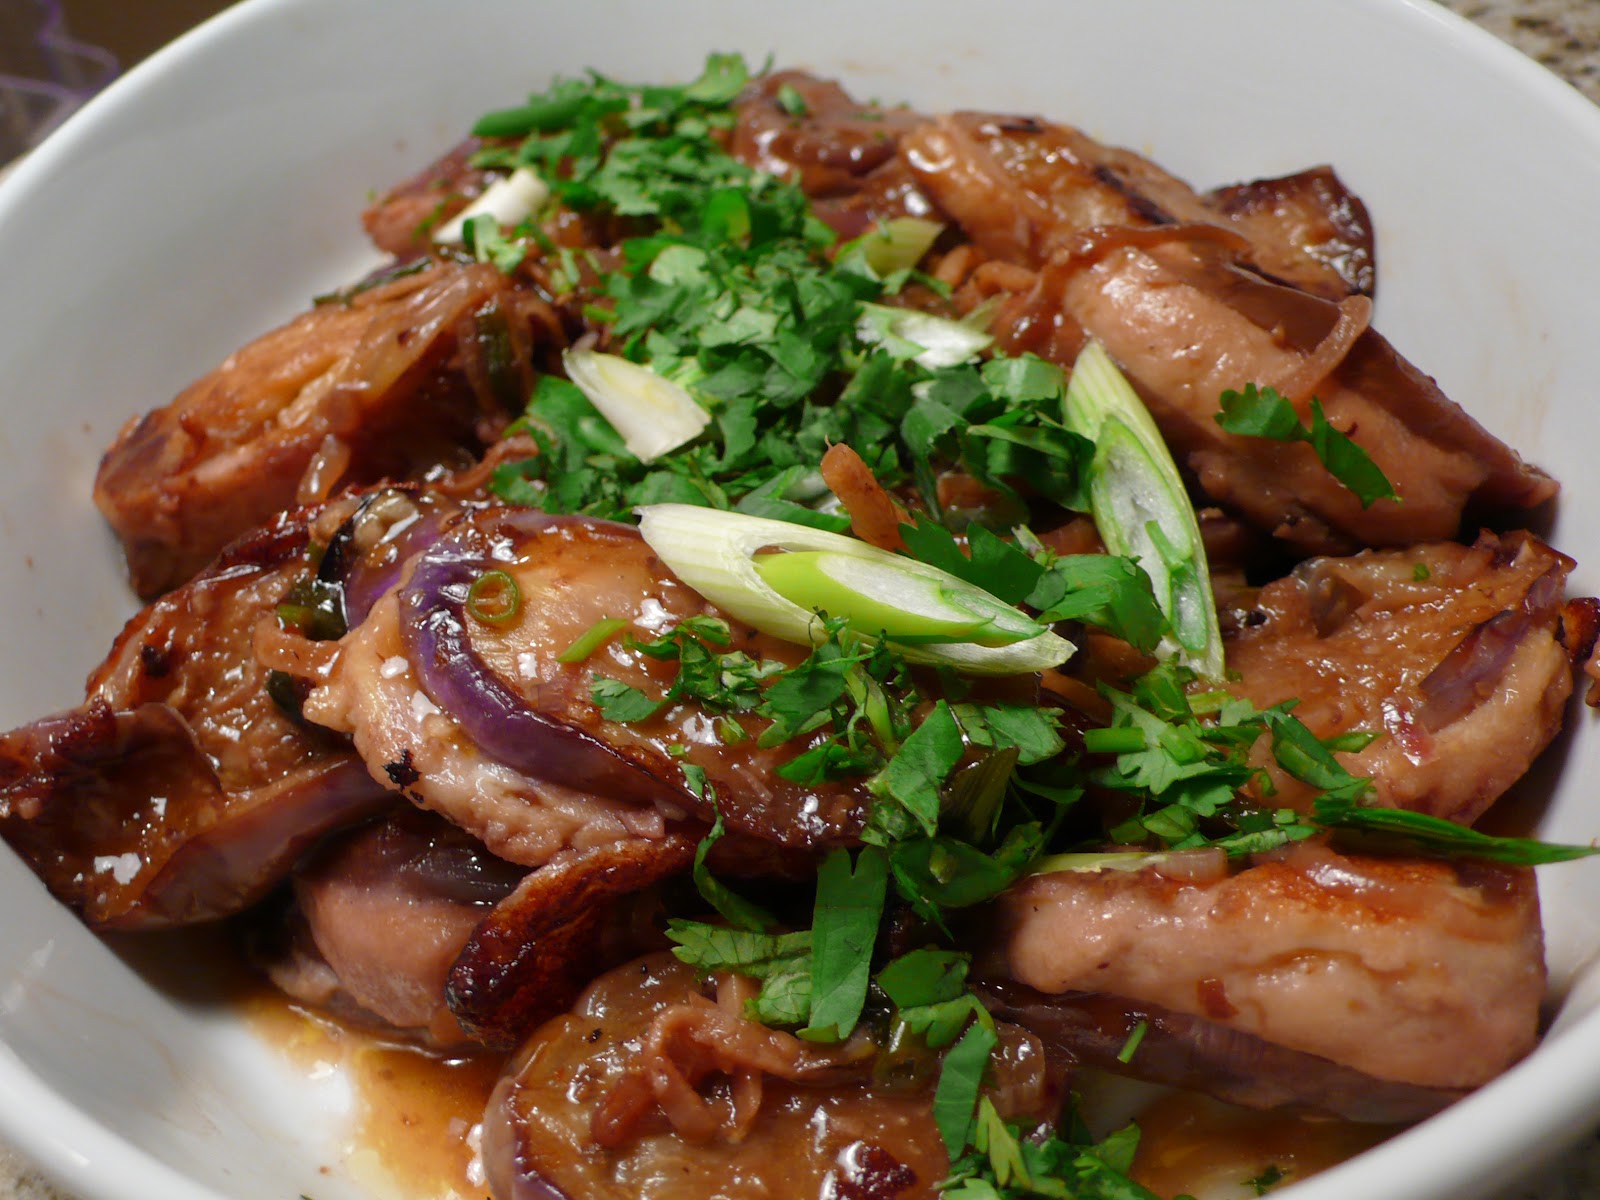
In my travels, I've also come across braised eggplant. In Beijing, China, one of the restaurants right outside the Forbidden City had braised eggplant on the menu; when trying to figure out what to order for my friends my eyes stopped at 紅燒 (hong shao), the Chinese word for braised. To say the least, 紅燒茄子 (hong shao qie zi) turned out to be a hit! Braised in a red sauce, it was sweet and really tasty; the dish disappeared quickly among my non-Chinese friends. To be honest, I'm not even sure they knew what it was, but they loved it anyway. :) 


Well, that's about all for today! Huzzah for aubergines! There are tons of other possibilities in the eggplant world yet to be explored! Please feel free to share any in the comments section! Happy eggplanting--well, don't go out planting eggs... I doubt you'll get a tree that blossoms chickens or a bush that sprouts eggs. 

Tuesday, August 30, 2011

Gastronomy in Germany!

Visited Berlin last April on a one month backpacking trip across Europe! Studying and living in England introduced me to the kebap and the döner, of which I was told were Turkish... later I was told that the döner is originally German! Regardless of whether that's true or not, you can guess what my first meal in Berlin was then...

Yes, that is the Brandenburg gate in the background! Anyways, this döner, from a cart in the road (go street food!) was the best one I'd ever had. Probably one of the cheapest too. The döner-kebap is closely related to Greek gyros. The meat in the döner, whether chicken, lamb or beef, is roasted on a rotating spit and sliced off into flatbread and then accompanied by sliced raw onions, cucumbers, lettuce, tomatoes and a yoghurt sauce similar to tzatziki. The veggies were so refreshing after coming out of a carb-saturated tour of Italy!

Amidst a free walking tour, my eyes landed on this famous chocolatier:

Going as far back as 1863, Fassbender and Rausch were chosen as the official chocolate suppliers to the royal German family. That spells quality, no?

After the tour, my travel buddy and I made a beeline back to the chocolate shop (shop is a bit of an understatement as the place consists of multiple floors lined in marble, gold gilding and glass).


After drooling over the truffles, buying samples for ourselves and friends back home, we took the elevator up to the 2nd floor cafe. In the late afternoon there were plenty of people having their between-meals coffees. We popped open the menu and perused a bit after we were shown to a table with a pretty fabulous view.


The menu's prices were around what we expected for a pretty fancy place, but we figured, hey, we're staying in a hostel, not a hotel; we've been eating cheap (but amazing) street food, and we've been walking everywhere, thus saving lots of money. Why not?

What's an afternoon coffee-break without coffee? And they gave a complimentary chocolate!

Traditional apple strudel. Excellent, light, flaky, buttery and perfectly sweet! Great presentation as well!

The eisschokolade (ice-chocolate drink) was definitely my favourite, being a chocoholic. They didn't skimp on the cocoa neither. Plus, who doesn't love fresh whipped cream? Heavenly!

Another venture with sweets that I partook in was a trip to KaDeWe, a fancy superstore of an establishment with a famous gourmet food court.

The inside was absolutely glorious! Fancy glass shelves and cases filled with beautifully plated pastries--everything you can imagine! Cakes, cupcakes, streudels, macarons, truffles, meringues, tarts, brownies...


It was such a difficult time choosing what to sample! So four of us settled to split these two beauties:

Our friend on the right is an apple pastry with streusel on top, a bit resembling a bear claw. The pastry on the right is a strawberries and cream tart (the whipped strawberry cream was spiked with some liquor and pretty strong). I must say, I gave the award to the apple pastry, which was buttery and rather donut-like.

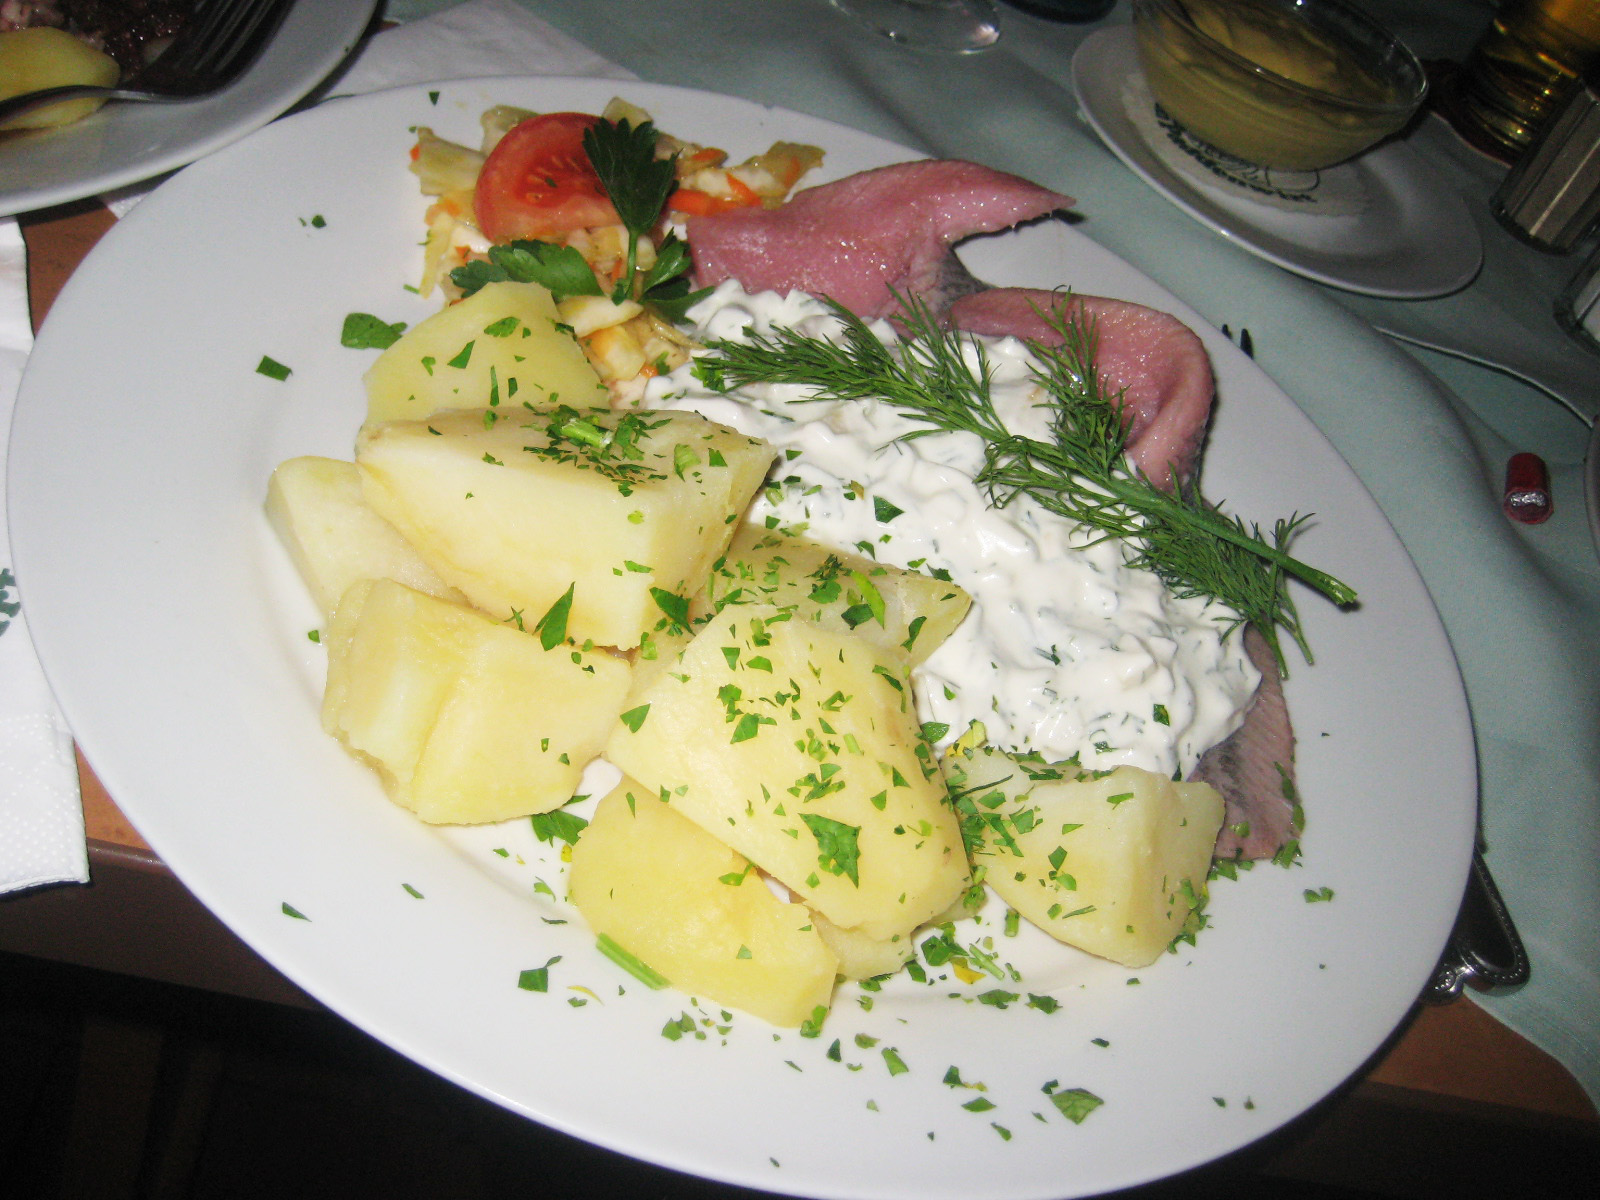
In addition to sweets and street food, we also tried to sample more formal traditional cuisine. Our tour guide recommended a place to us called zum Paddenwirt that was slightly touristy, but served up reasonably priced German food. I decided to order herring with potatoes and sauerkraut.


Being the seafood-lover that I am, I enjoyed the herring quite a lot; it definitely needed the potatoes and yoghurt sauce to balance out the saltiness. The sprig of dill on top was a pretty touch as well.

My friends, feeling quite adventurous ordered pork knuckle/ankle with sauerkraut and potatoes. They enjoyed their fare a little less, so I probably ate most of it, to be honest. A little background: at home I eat pork ankle quite a bit, being of asian heritage and all, so it didn't freak me out. In fact, it was really good trying it pickled instead of braised in soy-sauce, which is also delicious.
Am I making your stomach turn? Maybe I can convince you: if you're willing to eat hot dogs or sausages (assuming you know what these are made of), what's to stop you from trying ankle? Really, it's just another piece of the animal (although, disclaimer: there are parts that I would not try).

Next up, wursts! (I spared you so many terrible puns just now...) Of course one has to sample the various wursts/sausages of Berlin when trying to get a good grasp of the country's culture. It's what Germany is known for, right?

Over our month's worth of trips, we made a habit out of looking up famous eateries; one of them was Currypoint (above). That was actually the last place we went and since we'd already had bratwurst and currywurst, we went for bockwurst!:

Bockwurst is different from bratwurst in that it is usually made with veal; it is also often simmered instead of grilled. It came with a side of potato salad.


Bratwurst is generally made of beef or pork, but it can be found made of veal; eaten with a sweet or hot German mustard, it can be then called currywurst!
Aside from the flavour, something else you should look for in a wurst is that snap you get when taking a bite; when cooked/grilled, the ground meat inside the casing expands, making the casing taut and giving you that satisfying snap on first bite!

Also bought a popular German drink called Mezzo Mix; the best way to describe it is orange Fanta mixed with Coke--in fact, when I spent New Years with my friend Lena in Germany, she and her friends made their own with Coca Cola and Fanta. Alas, we don't have it in the U.S...

Want to hear a secret?
My favourite sausage EVER is actually the käsewurst... which I ate in Leeds at the German Christmas Market.

The real kicker is that packed in the ground meat, there are squares of CHEESE and when the wurst is grilled, the cheese melts! This goes onto the list of one of the best things I've ever eaten.

In a Bowl, on Wheels, Off to Flavortown!

I was hangin' with my brother and our friend Eric yesterday; we decided to go get something to eat because that's our favourite past time.


And it was about 10:30pm and our palates and stomaches were being tortured watching Food Network's "Best Thing I Ever Ate." (And of course there's Guy Fieri of "Diners, Drive-Ins and Dives," whose job we are all secretly coveting... if only it didn't come with the bleach blonde hair and its tool-y disposition).

After making consulting with the crystal ball that is Yelp for a late-night eatery, we decided to make a trip to Asa Ramen, a hole-in-the way ramen shop in the South Bay. It was the last night all three of us were in the same city, so why not grab so local eats!

We were really lucky to have gotten there on the first go as the place is really easy to miss. The shop sign is also in Japanese kanji, which we can barely read. Venturing a guess, we turned out to be right. The restaurant side (I think the other half of the place is a bar) was starting to fill up with its late night patrons so we were seated at the bar. The menu was thankfully short (two ramens with an assortment of takoyaki--fried octopus with various toppings), with big enough writing for the dimly-lit establishment, and reading Yelp reviews made ordering even easier!

"3 Koterri Ramen please!"

I usually smell the food before I eat it--it's just a habit--and I couldn't wait to sip the fragrant broth even though I'm pretty sure they just spooned it out of a boiling hot pot. It tasted just as good as it smelled! Eric told us that "koterri" means "rich," as in "rich in flavour." The seasoning was amazing, having absorbed all the flavour that the sliced pork has to offer (when eating ramen, one of the pillars of judgment is the taste of the broth). It really is one of the best, if not the best, broths I've had in ramen ever! Being both flavourful and tasty, there was a lot of body to the broth, it wasn't oily and the green onions held its hand like an old friend! As a comfort food, there wasn't a crazy lot of dimension to the broth, but that's not what you're looking for in comfort food anyways. Though nice and light, the broth is the statement in the ramen!

The noodles were cooked al dente and are probably made in the shop. The toppings on the ramen were modest, containing plenty of chopped green onions, two slices of pork and sliced bamboo, which I really enjoyed. The bowl cost about $6 (one can upgrade to a large size for an additional $2). Asa is modest in size: when we left, there was a line going out the door. If you do plan a trip there, I would recommend going with a small party, as it's a more intimate eatery. Overall, it was a pleasant eating experience and I am definitely planning on making a trip to Asa Ramen again!

Saturday, August 27, 2011

Speakeasies in San Diego

I first discovered the novelty of San Diego's speakeasies when my pal Donna had her 22nd birthday at Vin de Syrah in Downtown San Diego. 'Speakeasy' is a term from the Prohibition era when alcohol faced being illegal, so speakeasies were set up as secret watering holes in the 2o's. I was invited to go along and visit the Alice in Wonderland-themed wine bar and found it absolutely charming in decor!

From large hedge-mazes to playing cards on the ceiling to animal statues, the vibe of Vin de Syrah is a classier place for a night out; I would recommend dressing to impress here. As any speakeasy, Vin de Syrah is hidden in central Downtown San Diego on a corner. A set of stairs lead down to a graffiti-lined basement and a door camouflaged in a hedge.


Being the poor student that I am skipped out on ordering their wide selection of fine wines (I know, go to a place called "Vin de Syrah" and not order wine?! Readers, I'm spending most of my greenbacks on education--whether that's doing anything for me is up to you to decide). Instead I opted to share cheese platters and sangria (white and red) with my pals. The cheese boards were very gourmet and there was one coconut-cured gouda that I was particularly fond of. With the cheese came various marmalades (a honey-ginger marmalade that was lovely), chocolate that resembled that of a heath bar (not too crazy about it), slices of green apple, grapes, an assortment of other cheeses and slices of bread that seemed less fresh than the other accoutrements on the board (in the US I'm not a fan of bread--every other country seems to bake bread better than we do--so maybe I'm a carb-snob).

The red and white sangrias were equally tasty! I don't have an in on their marinating process, but it seemed to have been done well as the sangria was sweet with different layers of flavour. The perfect girly drink!

For DarlingYellow's birthday, we visited The Noble Experiment. This exclusive speakeasy requires you to TEXT a reservation in advance--they do not take walk-ins, so don't expect to be admitted even if you do find the secret door (dressed as a stack of kegs) at the back of The Neighborhood on the east side of Downtown SD. The Noble Experiment is small and intimate, seating maybe about 30 people, so also don't go expecting to have a huge hen/stag party there.


The decor inside is hip and pretentious almost; with one wall lined completely with golden skulls facing the bar, the ceilings and adjacent walls are decorated with oil paintings and LCD screens with trippy graphics, including a mounted deer head graphic that--what is that? Did it wink at me? I should stare at it for the next five minutes just to make sure!!! Flash photos aren't allowed to preserve the ambiance of the speakeasy--okay, fine, it is pretentious. Luckily, the service is quite friendly and not pretentious at all.


The vibe of the speakeasy is pretty classy, so in going I would dress to impress, though not formally. The booths are intimate... meaning they are quite small. They were cramped for our party of six. I'd recommend inviting no more than 3 other people to go with you. The prices are also a bit more, but you are getting fancier drinks; the drinks start at $12 and there is no vodka or beer in the place to keep with the prohibition theme. Feeling girly, I ordered the strawberry daiquiri:


Together, our group ordered strawberry daiquiris, "The Cloud," Country Gentleman and the Morning Glory Fizz (there is a pretty small menu, but despite this, you can order any mix you want). Dealer's Choice is also an option, being that the waitstaff will ask a bit about your tastes for drinks and bring back a surprise for you. "The Cloud" was a drink with grapefruit juice that I loved and would order again. My strawberry daiquiri, though with "light rum" packed quite a punch, so if you're a lightweight like me, go slow. It was definitely the most fragrant drink of them all; the quartered strawberry garnish sold it, to be honest. Taking a sip of your daiquiri also lets you catch a whiff of the strawberry, the main essence of the drink. I personally enjoyed the Dealer's Choice more than the daiquiri.

The Country Gentleman boasted spirits of 100 proof (50% alcohol) and knocked me clean off my feet! The apple brandy was tasty and powerful, but I'm not a huge drinker, so I will let you judge this for yourself.

I enjoyed my experiences at both places thoroughly and I would love to return, but I can tell you it's not going to happen frequently because of the hefty prices. Nonetheless, I recommend them both for quite an experience!